> For the complete documentation index, see [llms.txt](https://developer.opzeknd.xyz/llms.txt). Markdown versions of documentation pages are available by appending `.md` to page URLs; this page is available as [Markdown](https://developer.opzeknd.xyz/binance-integration/deposit-and-withdraw-bep-2.md).
# Deposit and Withdraw BEP-2
### Getting Started - What is BEP-2
BEP-2 represents a common set of rules for token management on the Binance Chain and it specifies:
* What information makes a token on Binance Chain
* What actions can be performed on a token on Binance Chain
See the [BEP-2 GitHub page](https://github.com/binance-chain/BEPs/blob/master/BEP2.md) for more details.
### #Purpose
This is the second guide in our Binance series. First, we walked you through the process of transferring BNB between Binance and zeknd. However, as a developer, you can also launch your BEP2 token on Binance. This guide shows how to build a simple DApp that transfers BEP2 tokens between Binance TestNet and zeknd TestNet. The third guide in the series will explain how to transfer a token between Binance, zeknd, and Ethereum.
Let's get the ball rolling!
### #Prerequisites
* Node.js 10 or higher (recommended v10.15.3)
To check out if Node.js is installed on your computer, fire up a terminal and type the following command:
```
node -v
```
If Node.js is already installed, you'll see something like the following:
```
v10.15.3
```
If Node.js is not installed, or you're running an older version, you can download the installer from [this page](https://nodejs.org/en/download/)
* a Binance account. Follow the instructions on the [Binance Register](https://www.binance.com/en/register) page to create an account.
* the Binance chain [CLI](https://docs.binance.org/api-reference/cli.html). You can grab it from this [GitHhub Repository](https://github.com/binance-chain/node-binary/tree/master/cli). Note that, for the scope of this example, we will be using the `testnet` version.
### #1. Setting Things Up
Issuing a new token on Binance TestNet will require you to pay a fee of 500 TestNet BNB tokens. Thus, before moving forward with this example, you must get at least 500 TestNet BNB tokens by following the steps from below:
* Go to the Binance [Create New Wallet](https://testnet.binance.org/en/create) page and create **three** Binance TestNet wallets. Let's call them A, B, and C. Download the keystore files and give them some meaningful names such as `keystore_a`, `keystore_b`, and `keystore_c`. Alsdo, don't forget to save the mnemonics somewhere safe.
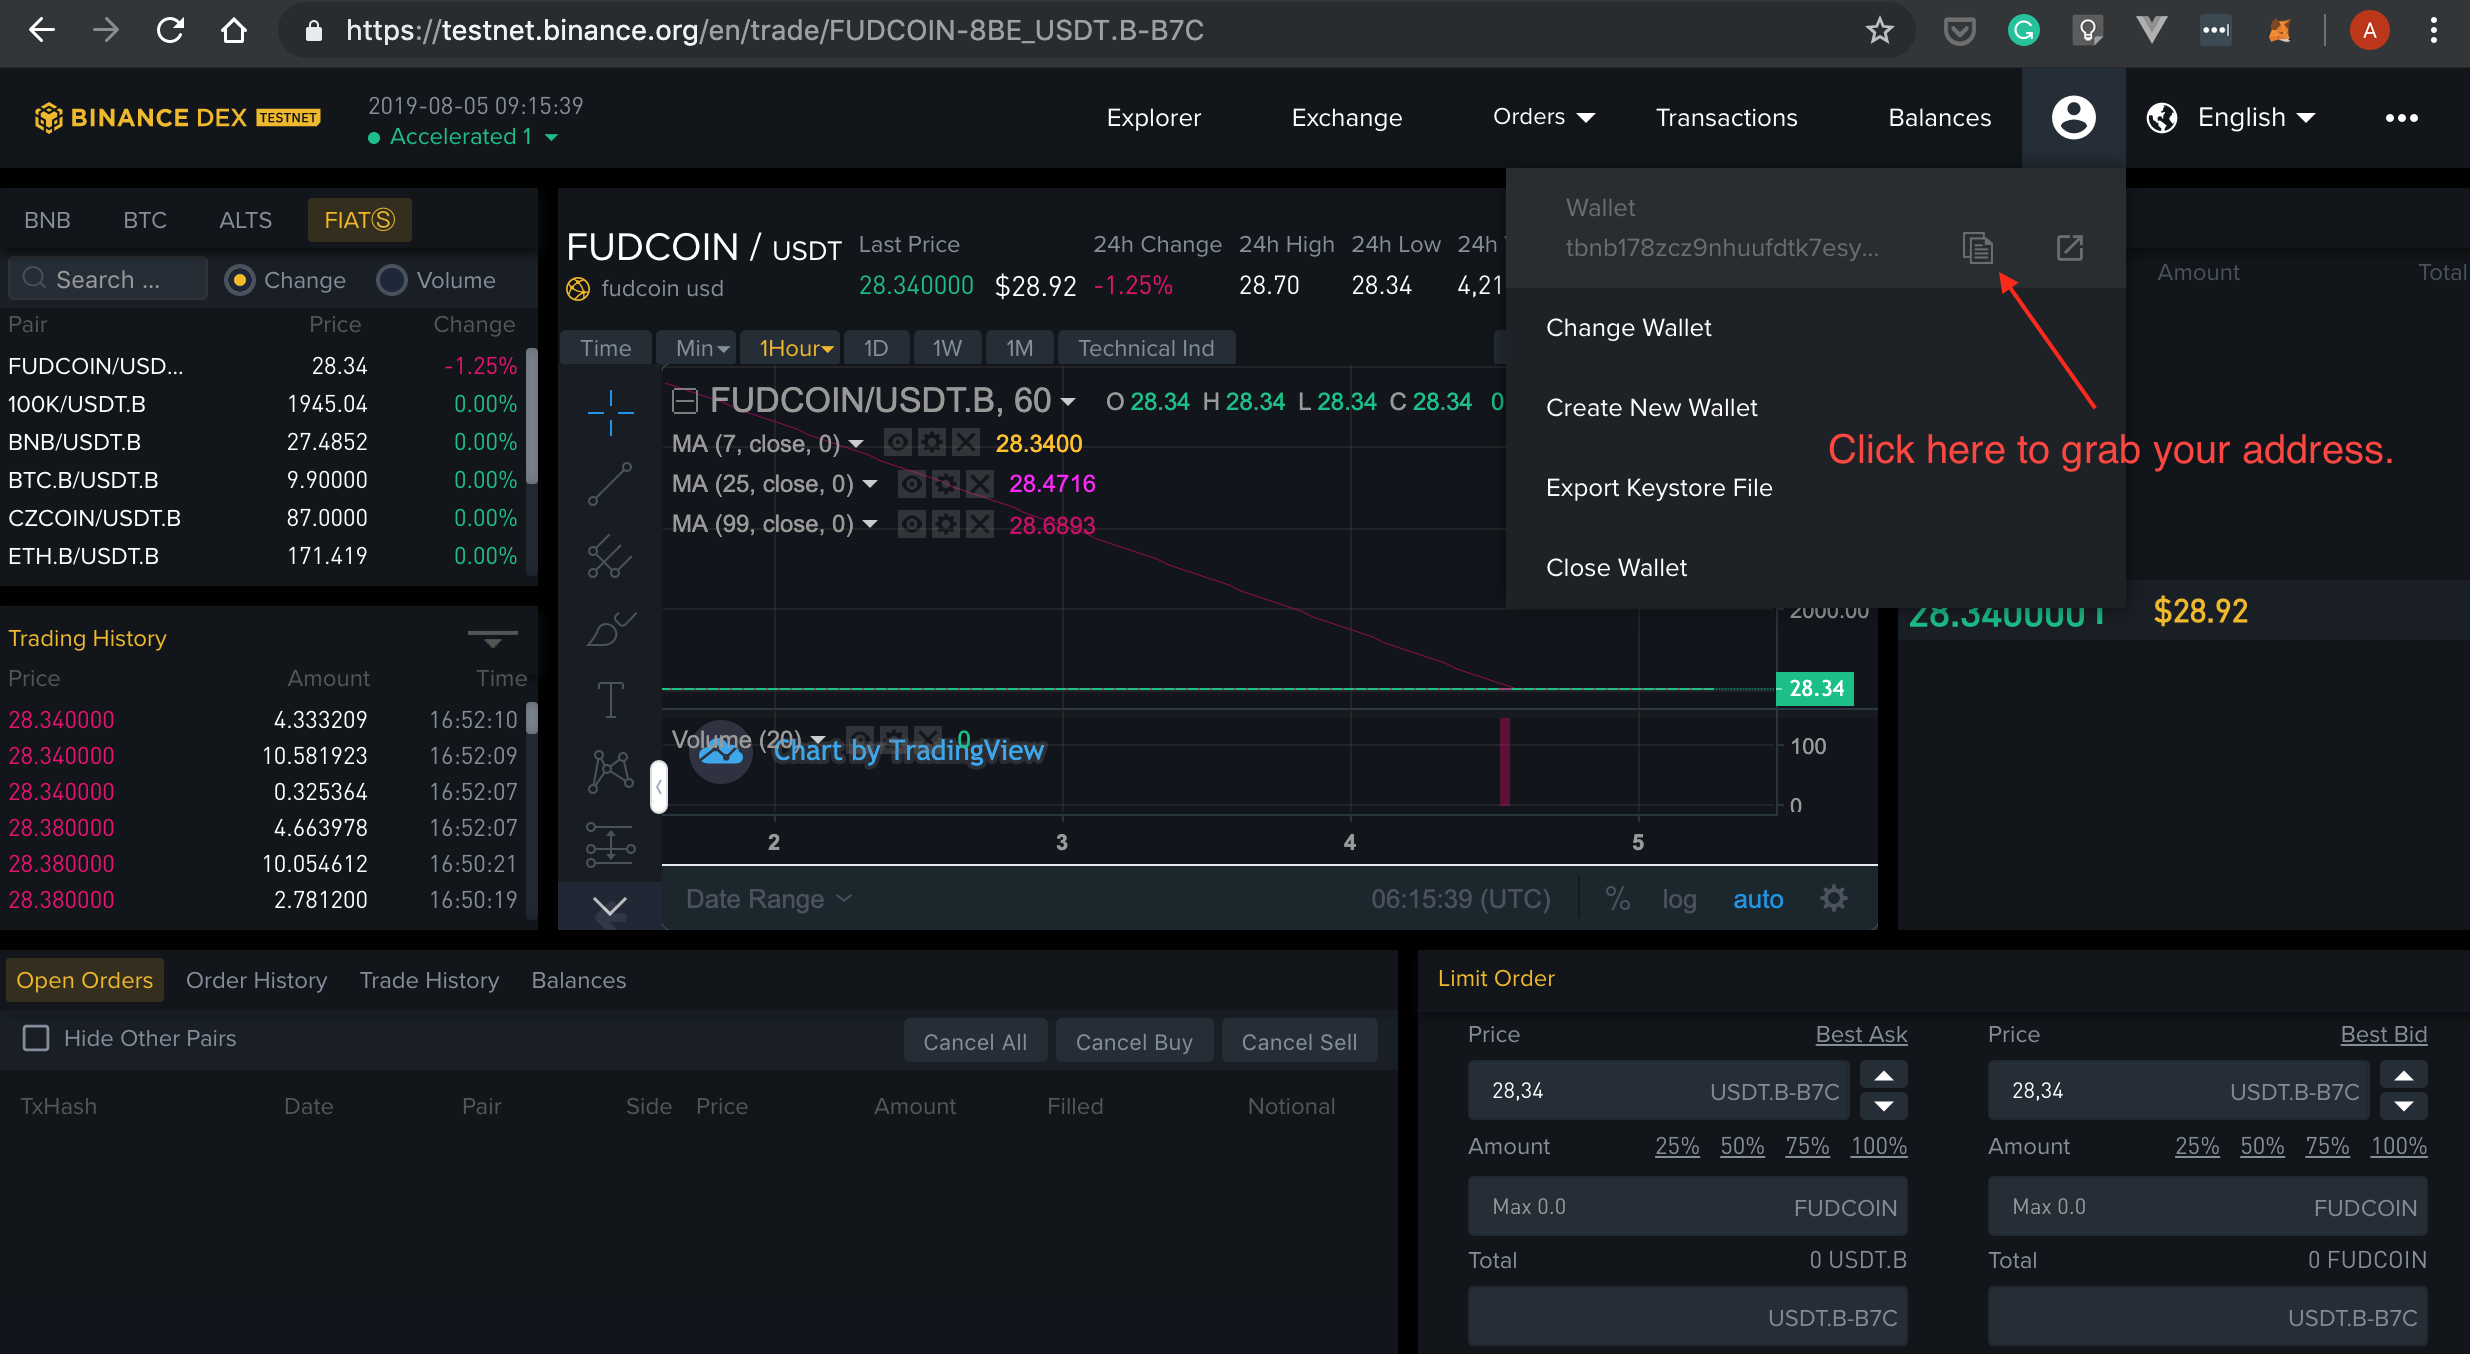
* Head over to the [Unlock Page](https://testnet.binance.org/en/unlock) and unlock wallet A. This will take you the Binance DEX main page. Select your account from the top menu bar and copy your address. Next, paste it to a new document.
* Repeat the step from above for wallet B and then for C.
* At this point, you are ready to get yourself some BNB TestNet tokens. Go to the [Binance TestNet Faucet](https://www.binance.com/en/dex/testnet/address) and paste your addresses:
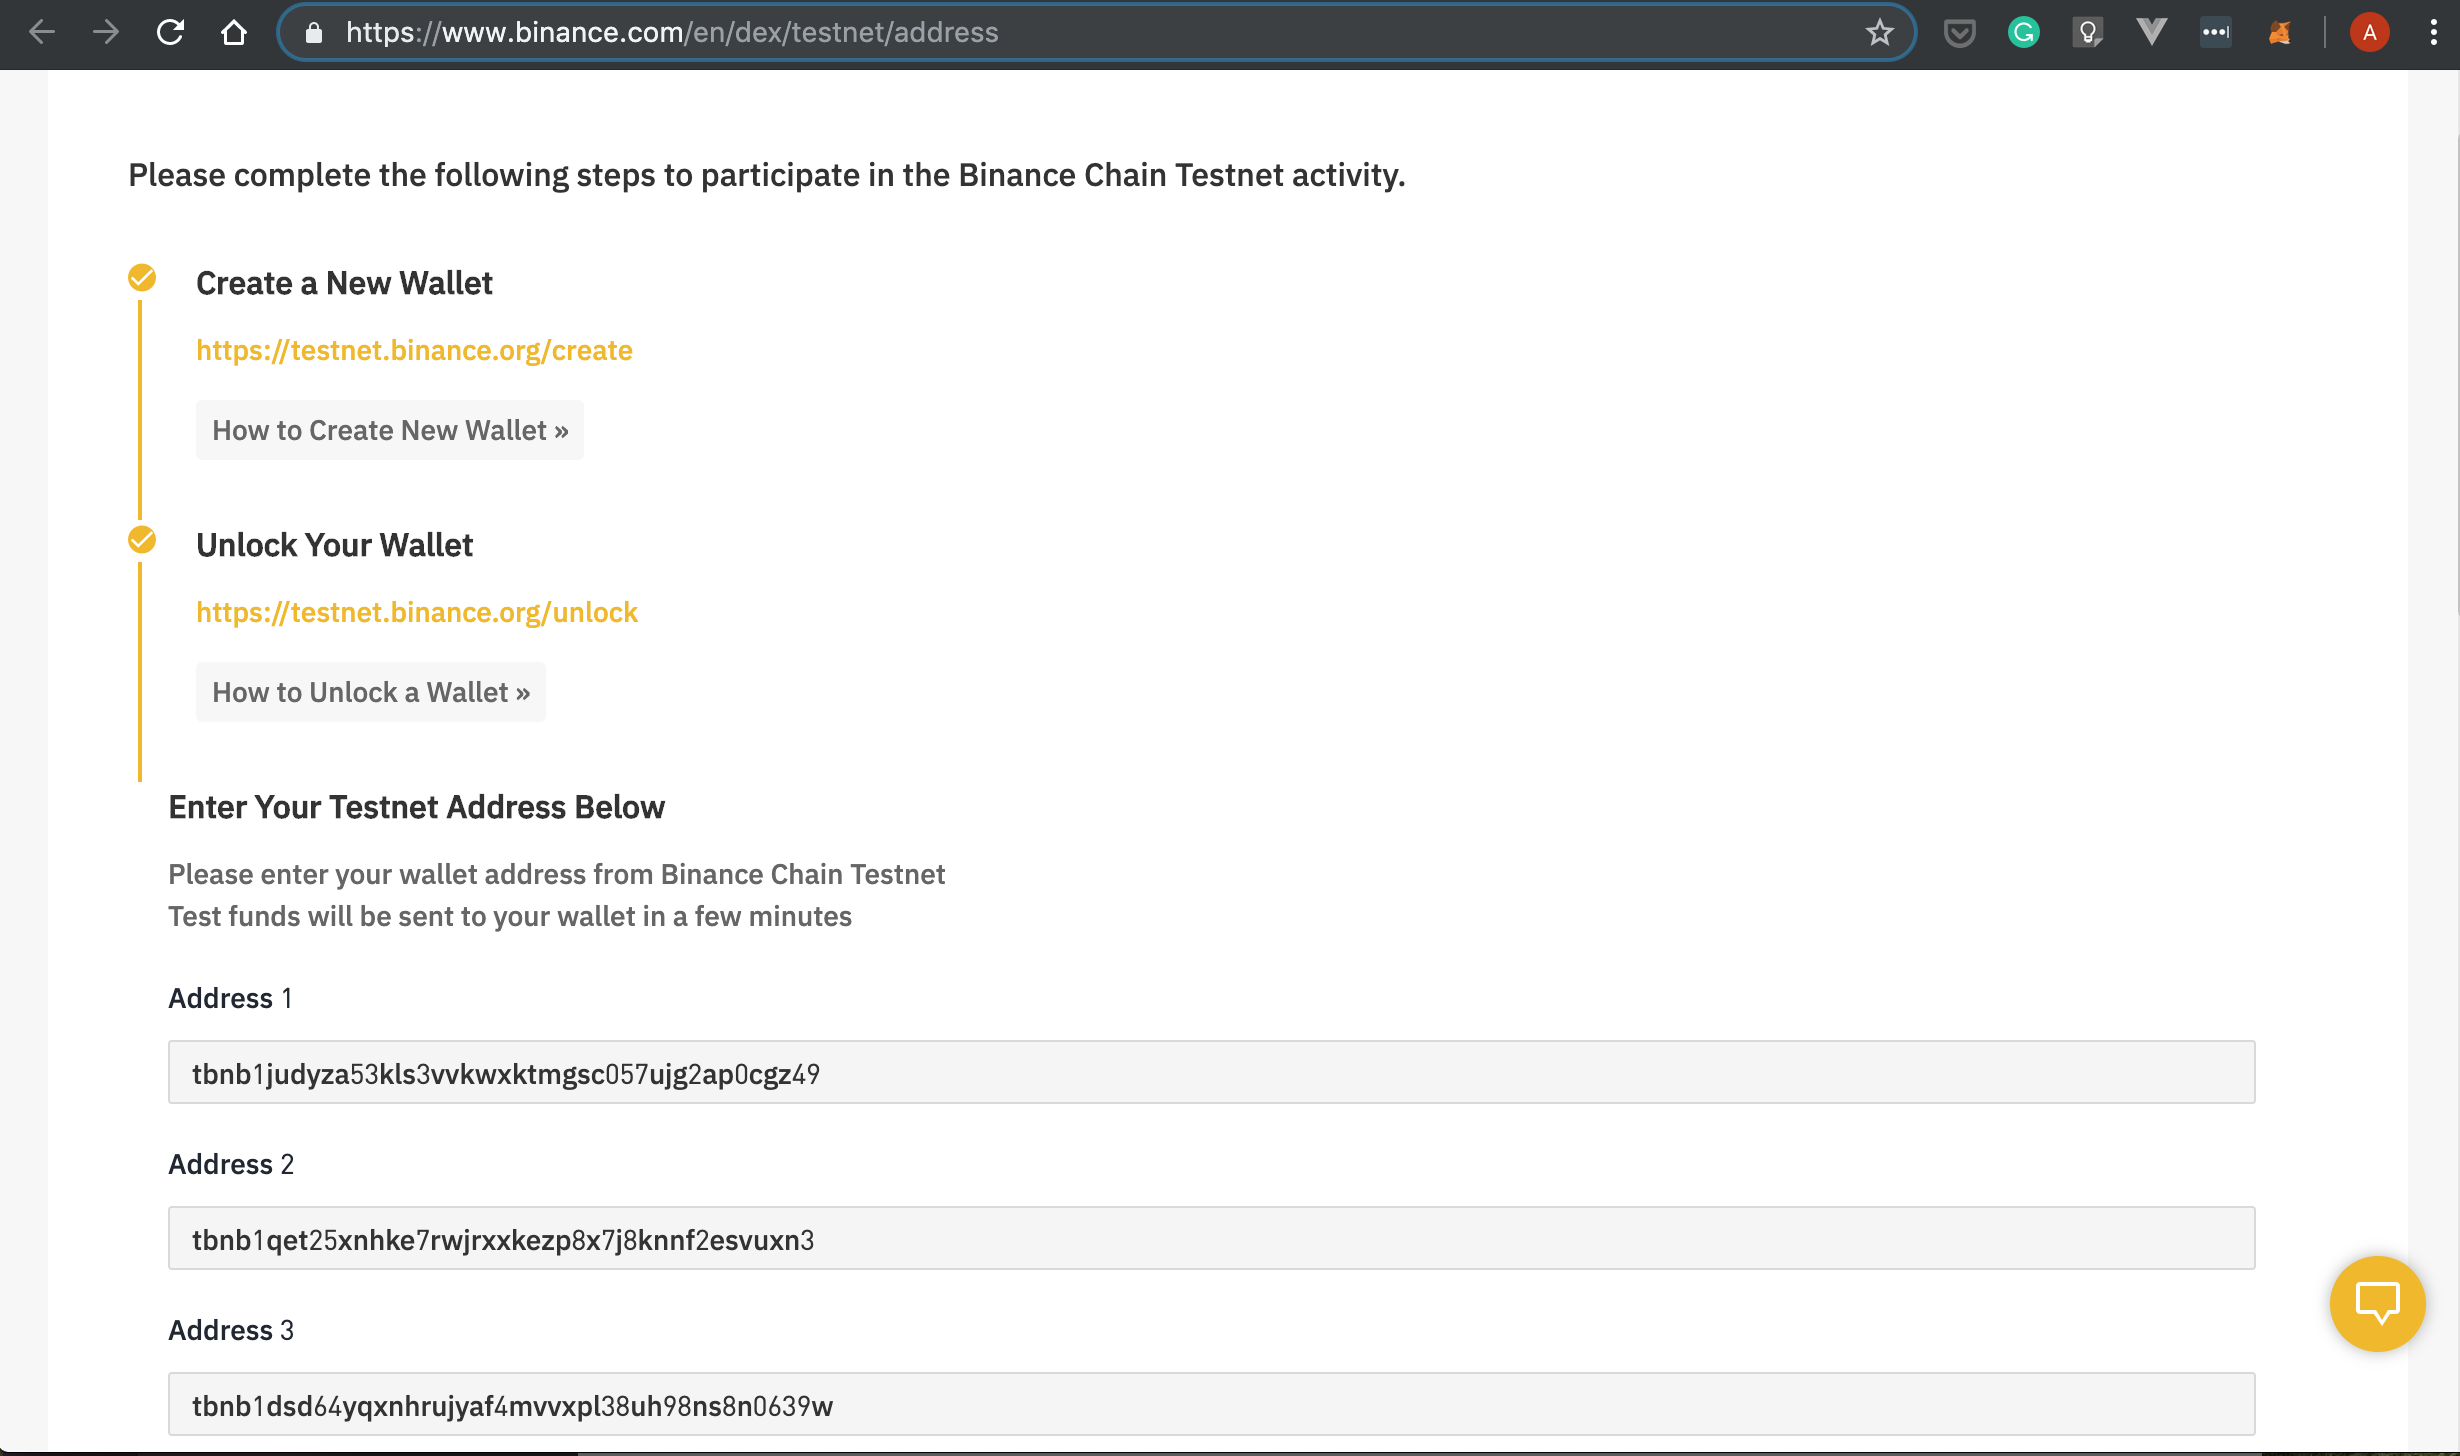
* Once finished, click the `Submit button`. This will credit each wallet with 200 TestNet BNB tokens.
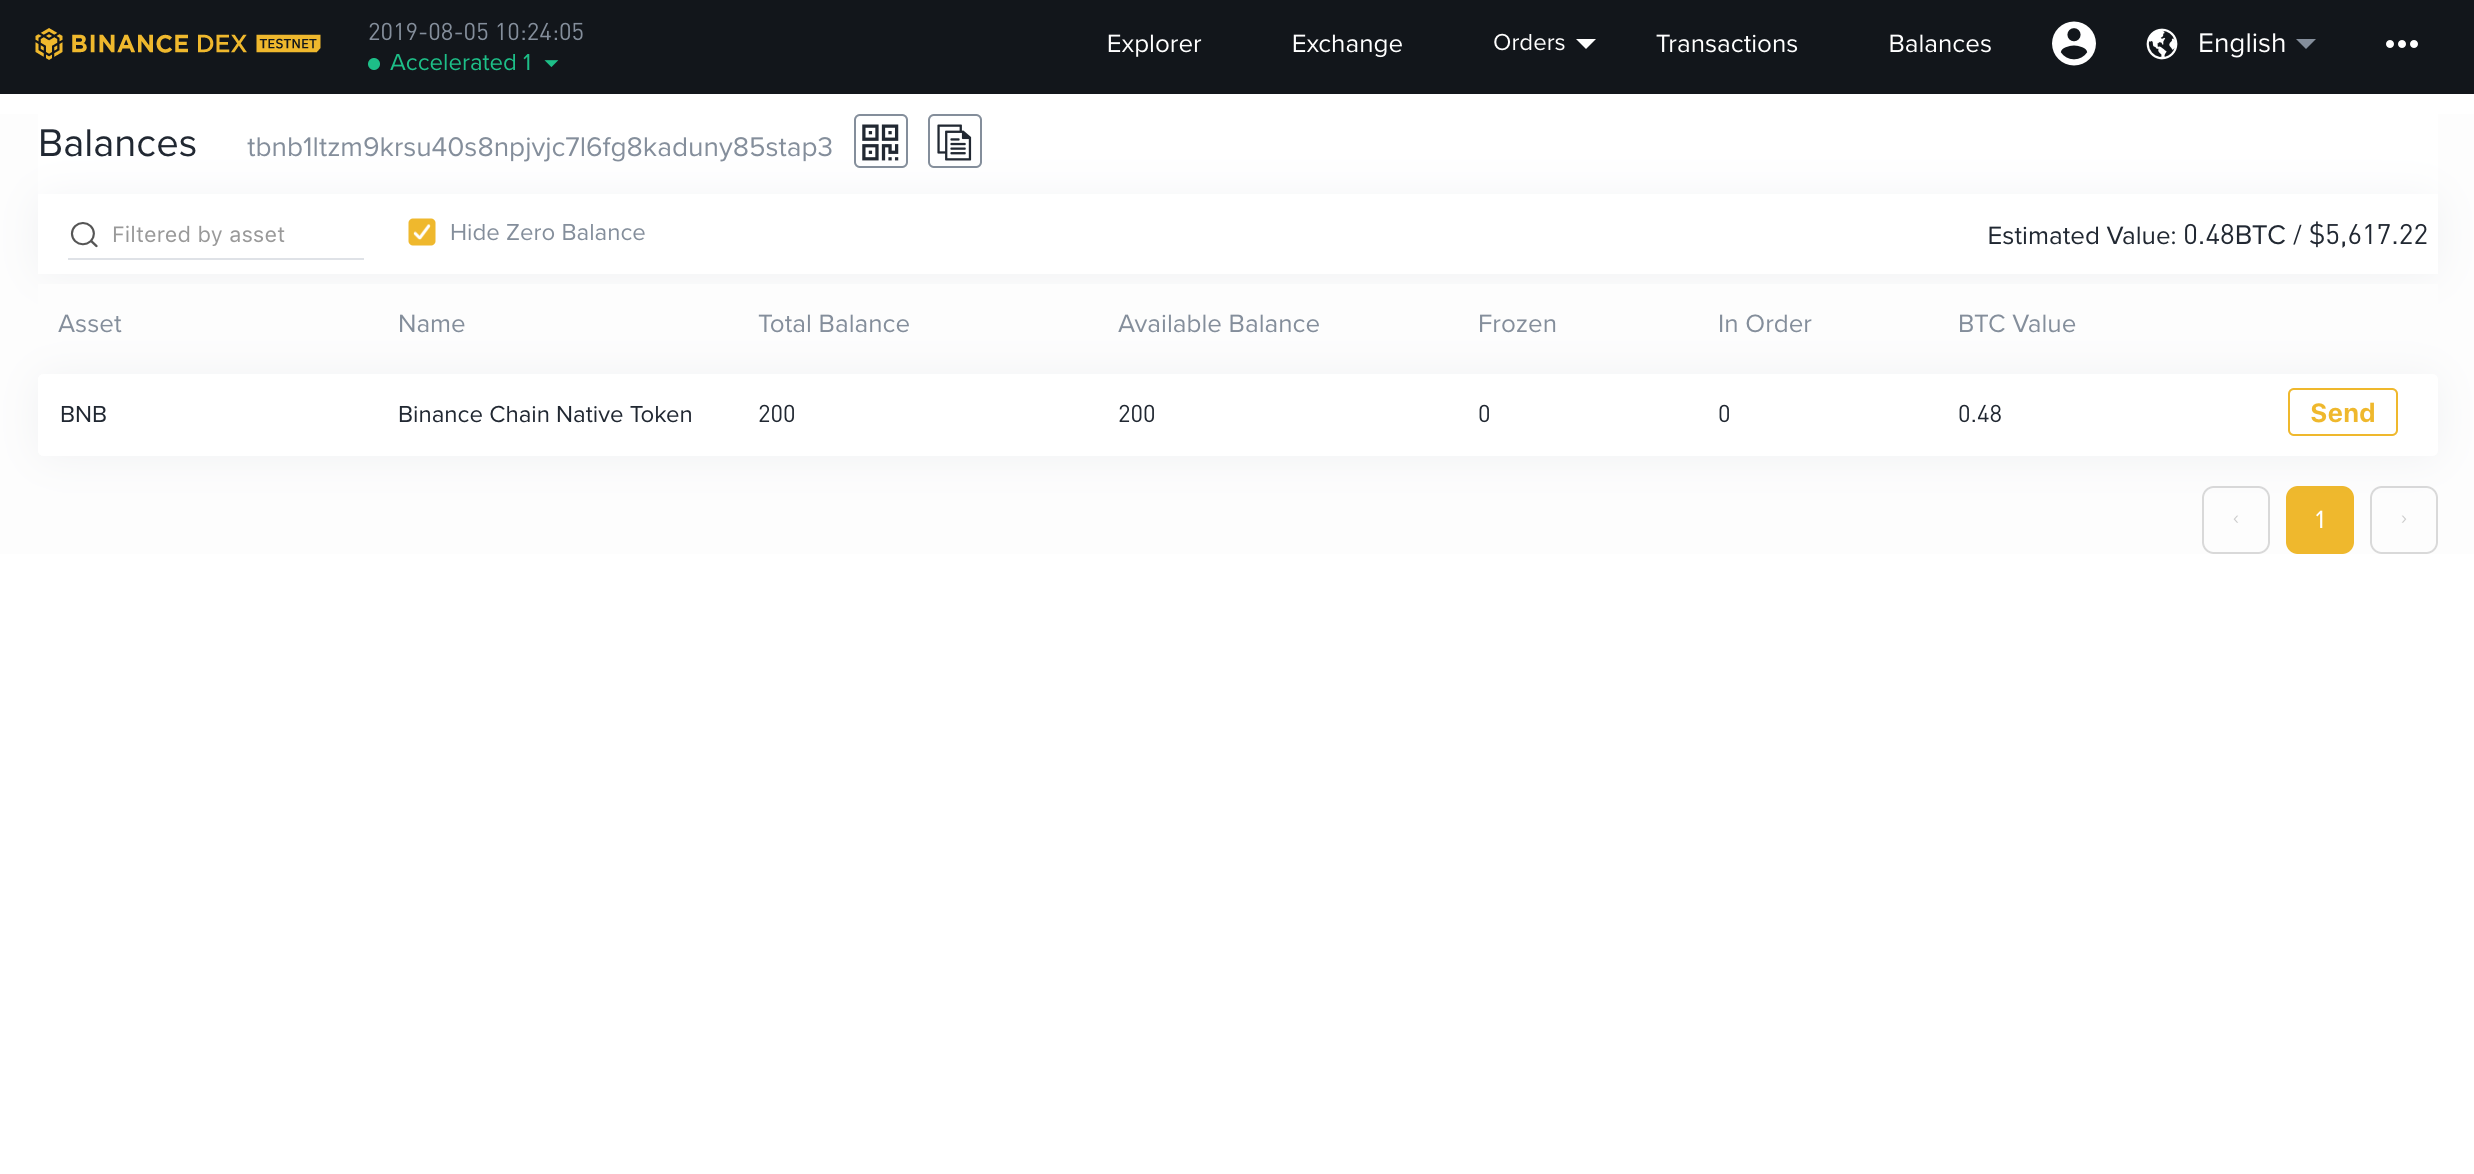
* Now, what's left to do is to transfer the BNB TestNet tokens from wallet B and C to wallet A. Let's [unlock](https://testnet.binance.org/en/unlock) wallet B by uploading the keystore file and typing the password. This will redirect you to the Binance TestNet home page. From the top menu bar select `Balances` and then click `Send`:
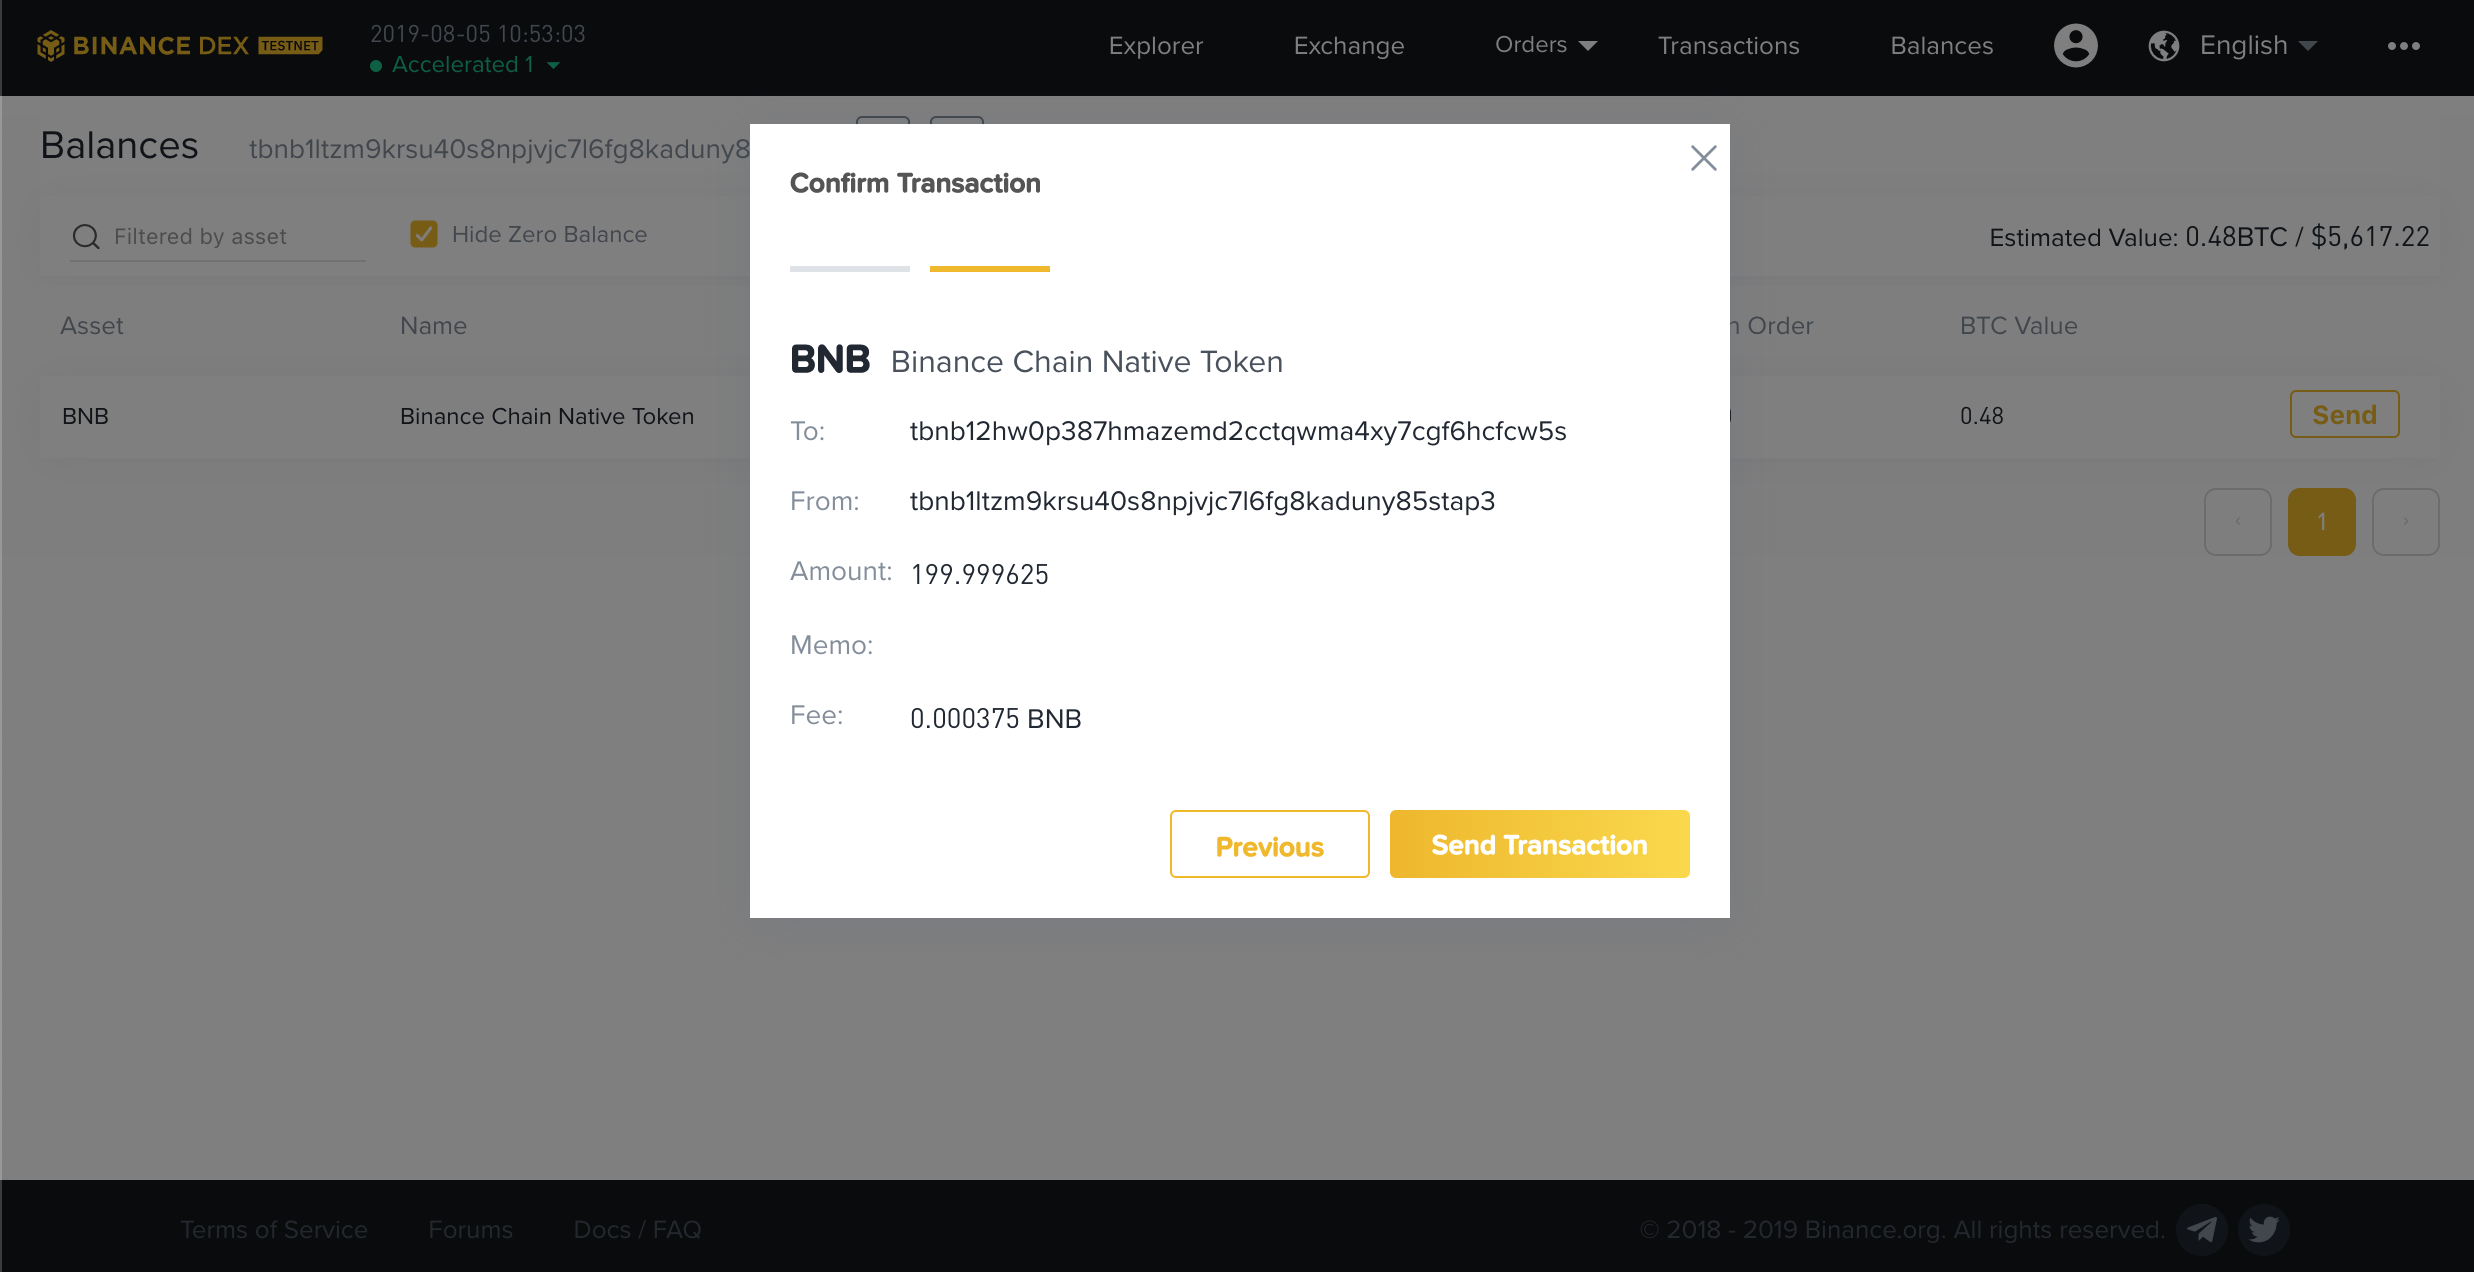
* Fill in the input box with the address of the wallet A and make sure you send all the tokens by clicking the `Max` button:
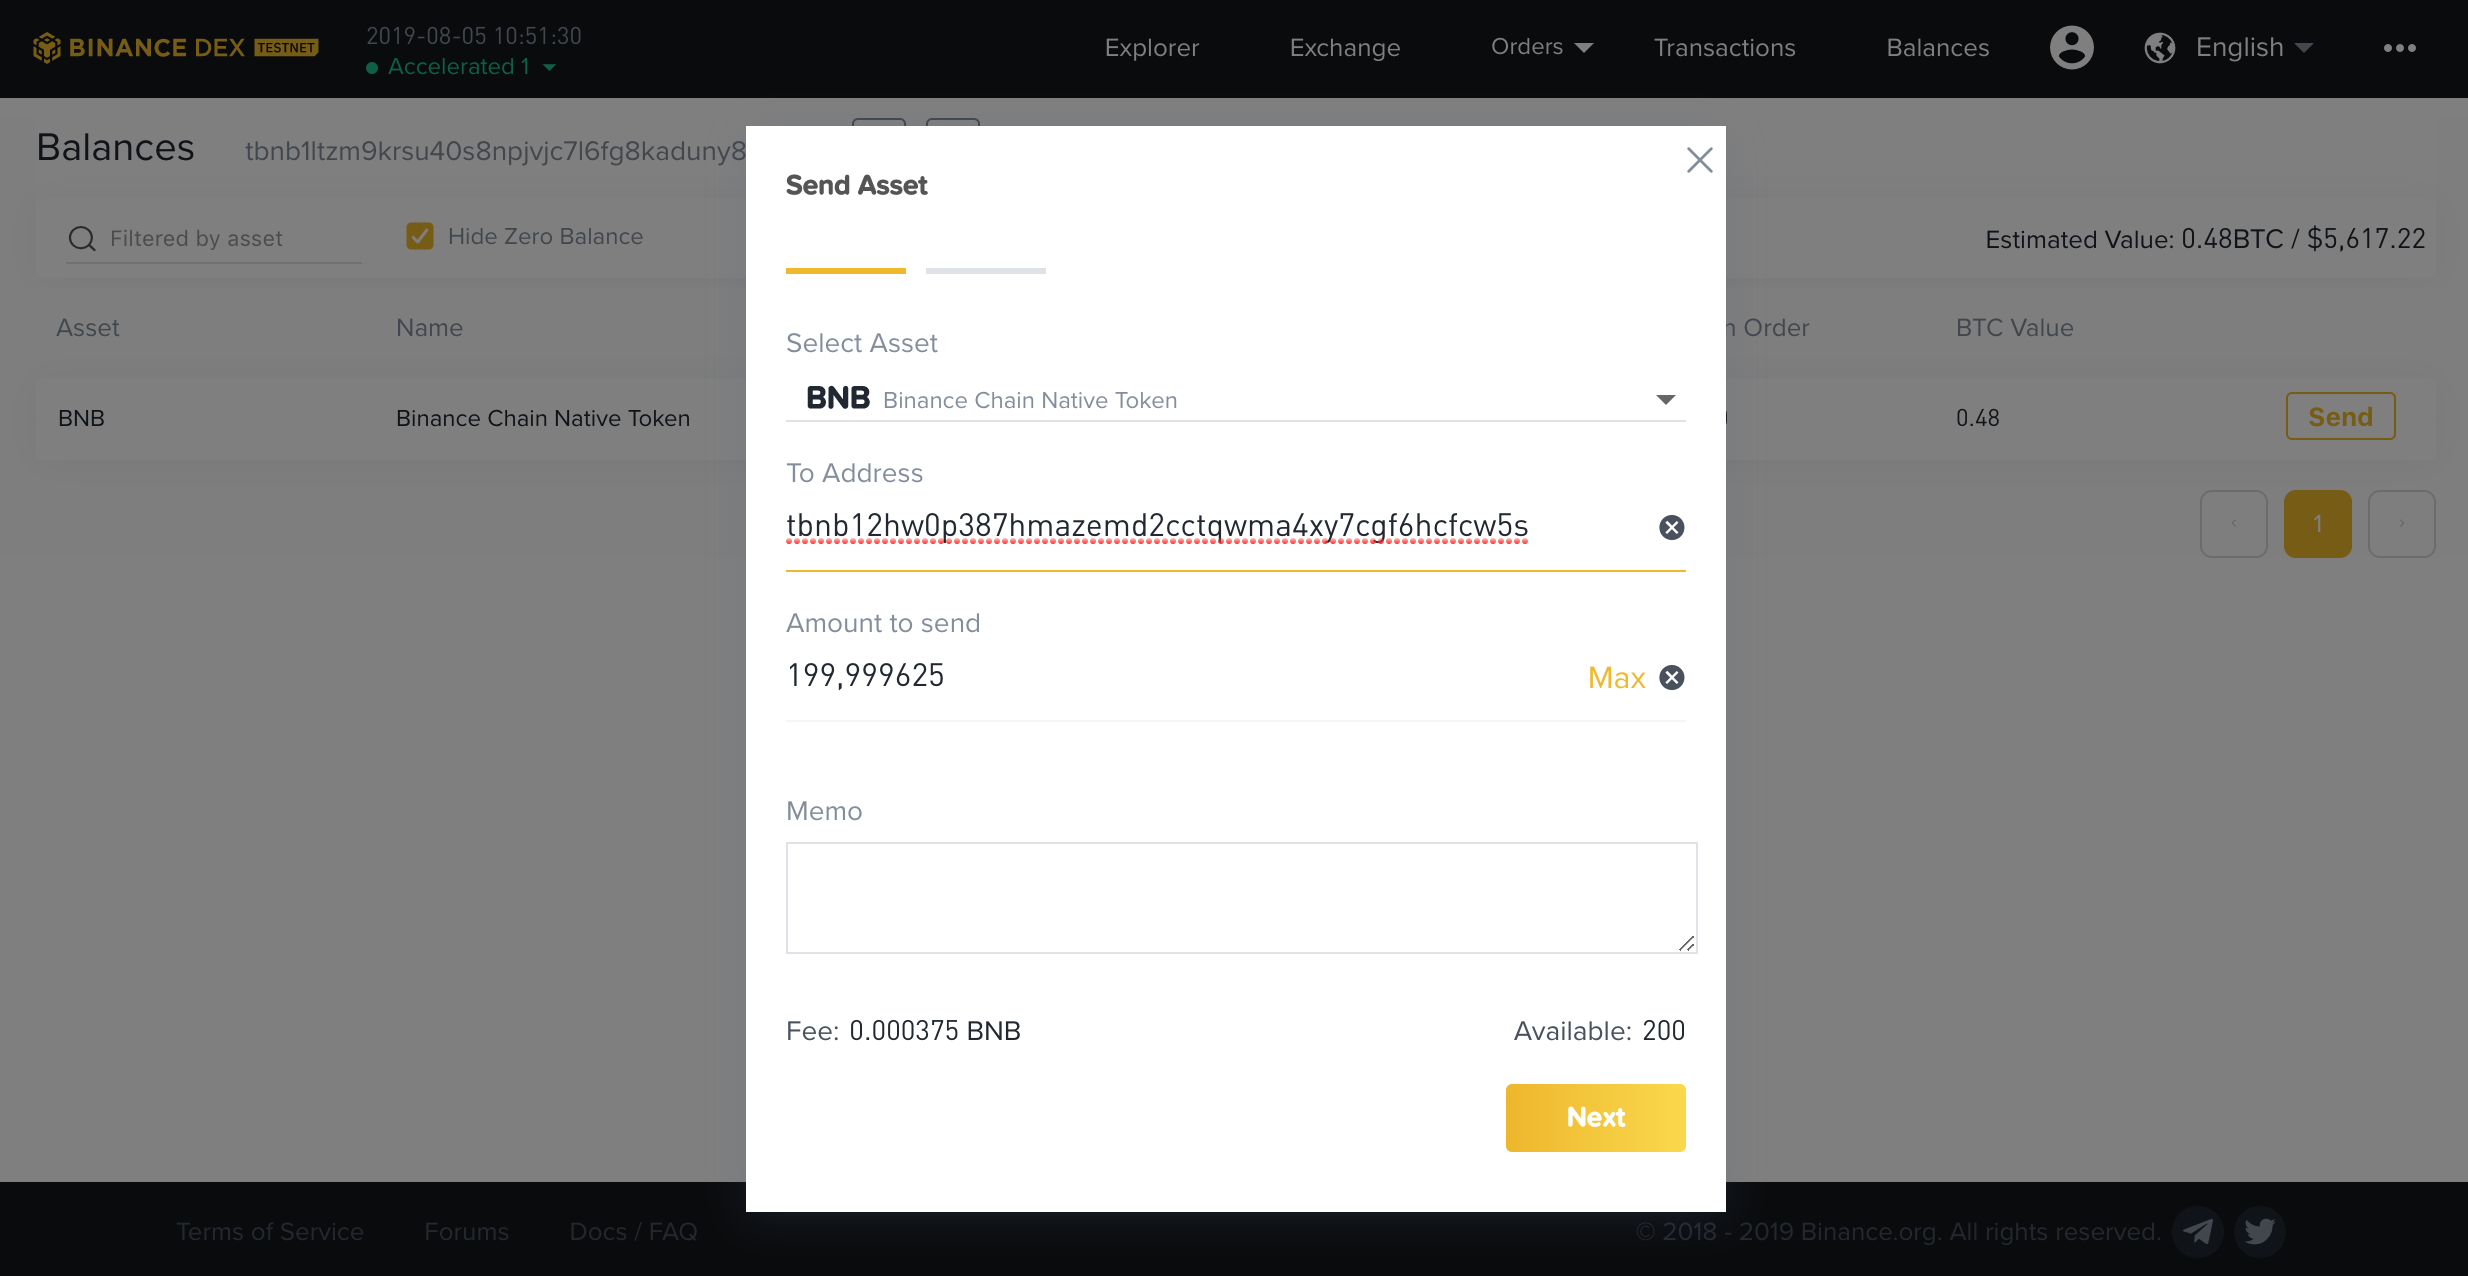
* Now, confirm the transaction details and the tokens will be transferred to wallet A:
* Repeat the process for `wallet B`.
At this point, `wallet A` should hold 600 BNB tokens.
#### #1.a Importing Your Wallet
Before issuing a new token on Binance TestNet, you must import `wallet A` locally. To do so, `cd` into the directory where you downloaded the Binance TestNet CLI and run the following command:
```
./tbnbcli keys add testkey --recover
```
This will import your wallet by recovering it from your seed phrase. Note that the recovery seed phrase is just the mnemonic phrase we asked you to save somewhere safe a bit earlier. You will be asked to type your password and then to enter your recovery seed phrase:
```
Enter a passphrase for your key:
Repeat the passphrase:
> Enter your recovery seed phrase:
```
You can check if your key was successfully imported with the following:
```
./tbnbcli keys list
```
The output should look similar to this:
```
./tbnbcli keys list
NAME: TYPE: ADDRESS: PUBKEY:
testkey local tbnb178zcz9nhuufdtk7esy22rel5k8zpsvqelr596w bnbp1addwnpepqt53muv8mf3j8r8sdkds7wsuvj0hamnq8argu4je4usjrzntewekxhuqw4y
```
#### #1.b Issuing a token on Binance TestNet
Run the following command to issue a `mintable` token on Binance TestNet:
```
./tbnbcli token issue --token-name "" --total-supply 100000000000000000 --symbol --mintable --from testkey --chain-id=Binance-Chain-Nile --node=data-seed-pre-2-s1.binance.org:80 --trust-node
```
> Note: In the above command, replace `` and `` with your token name and symbol. Make sure they're unique.
First, you will be asked to type the password you set earlier:
```
Password to sign with 'testkey':
```
Next you'll see something like this printed out to the console:
```
Password to sign with 'testkey':
Committed at block 30761571 (tx hash: A164760DDF6BD6227F670CCBA2252EDA818D7D943A629881DDEC1B22F536B1F1, response: {Code:0 Data:[123 34 110 97 109 101 34 58 34 66 84 69 34 44 34 115 121 109 98 111 108 34 58 34 66 84 69 45 65 49 54 34 44 34 111 114 105 103 105 110 97 108 95 115 121 109 98 111 108 34 58 34 66 84 69 34 44 34 116 111 116 97 108 95 115 117 112 112 108 121 34 58 34 49 48 48 48 48 48 48 48 48 48 46 48 48 48 48 48 48 48 48 34 44 34 111 119 110 101 114 34 58 34 116 98 110 98 49 55 56 122 99 122 57 110 104 117 117 102 100 116 107 55 101 115 121 50 50 114 101 108 53 107 56 122 112 115 118 113 101 108 114 53 57 54 119 34 44 34 109 105 110 116 97 98 108 101 34 58 116 114 117 101 125]
Log:Msg 0: Issued BTE-A16 Info: GasWanted:0 GasUsed:0 Tags:[{Key:[97 99 116 105 111 110] Value:[105 115 115 117 101 77 115 103] XXX_NoUnkeyedLiteral:{} XXX_unrecognized:[] XXX_sizecache:0}] Codespace: XXX_NoUnkeyedLiteral:{} XXX_unrecognized:[] XXX_sizecache:0})
```
Note that Binance is adding a 3 letter suffix. As seen above (`Issued BTE-A16`), our token symbol is `BTE-A16`. Yours will be different.
For more details on how to issue tokens, see the [Binance Asset Management](https://docs.binance.org/tokens.html#asset-management) page.
#### #1.c Minting 1 Billion Tokens
Minting tokens is as easy as running this command:
```
./tbnbcli token mint --amount 100000000000000000 --symbol --from testKey --chain-id=Binance-Chain-Nile --node=data-seed-pre-2-s1.binance.org:80 --trust-node
```
You will be required to type your password and then you should see something like:
```
Password to sign with 'testkey':
Committed at block 31828719 (tx hash: 63DD7C2EEA2BA24EB78159B0BBBA6DFCEF7471EAD09E396F125BFCFCFA206893, response: {Code:0 Data:[50 48 48 48 48 48 48 48 48 48 48 48 48 48 48 48 48 48] Log:Msg 0: Info: GasWanted:0 GasUsed:0 Tags:[{Key:[97 99 116 105 111 110] Value:[109 105 110 116 77 115 103] XXX_NoUnkeyedLiteral:{} XXX_unrecognized:[] XXX_sizecache:0}] Codespace: XXX_NoUnkeyedLiteral:{} XXX_unrecognized:[] XXX_sizecache:0})
```
Now, you can check your balance on the Binance website by opening [the balances page](https://testnet.binance.org/en/balances).
#### #1.d Cloning the zeknd`-examples` Repository
At this point, we're ready to `clone` the zeknd`-examples` GitHub repository. Fire up a terminal, `cd` into your directory of choice, and run the following command:
```
git clone https://github.com/zekndnetwork/zeknd-examples
```
This will download the repository into a new directory called zeknd`-examples`. Let's `cd` into it and install the dependencies:
```
cd zeknd-examples
npm install
```
### #1.e Deploying to Extdev Testnet
To move BEP-2 tokens between Binance TestNet and Extdev TestNet we must deploy a corresponding ERC20 smart contract to zeknd. For demonstration purposes, we've created a shell of an smart contract - `SampleBEP2Token`. Its source code is listed below:
```
pragma solidity 0.4.24;
import './BEP2TokenTemplate.sol';
contract SampleBEP2Token is BEP2TokenTemplate {
constructor(address _gateway, string _name, string _symbol) BEP2TokenTemplate(_gateway, _name, _symbol) public {
}
}
```
As you can see, it basically inherits from `./BEP2TokenTemplate.sol,`. This smart contract provides a buch of useful functions and you can use it in your own apps by simply inheriting from it. Let's go ahead take a look at `./BEP2TokenTemplate.sol`:
```
pragma solidity 0.4.24;
import 'openzeppelin-solidity/contracts/token/ERC20/MintableToken.sol';
contract BEP2TokenTemplate is MintableToken {
mapping (address => bool) gateway;
string public name;
string public symbol;
uint8 public constant decimals = 8; // Need to have exact 8 decimals because of BEP2 specifications
uint256 public INITIAL_SUPPLY = 0 * (10 ** uint256(decimals));
mapping (address => bool) validator;
constructor(address _gateway, string _name, string _symbol) public {
gateway[_gateway] = true;
validator[msg.sender] = true;
totalSupply_ = INITIAL_SUPPLY;
balances[msg.sender] = INITIAL_SUPPLY;
name = _name;
symbol = _symbol;
}
function mintToGateway(uint256 _amount) onlyGateway public {
totalSupply_ = totalSupply_.add(_amount);
balances[msg.sender] = balances[msg.sender].add(_amount);
emit Mint(msg.sender, _amount);
}
// Overloaded `mint` function of Mintable token for onlyValidator
function mint(address _to, uint256 _amount) onlyValidator canMint public returns (bool) {
totalSupply_ = totalSupply_.add(_amount);
balances[_to] = balances[_to].add(_amount);
emit Mint(_to, _amount);
emit Transfer(address(0), _to, _amount);
return true;
}
function addValidator(address newValidator) onlyValidator public {
validator[newValidator] = true;
}
modifier onlyValidator() {
require(validator[msg.sender] == true, "not authorized to perform this action");
_;
}
modifier onlyGateway(){
require(gateway[msg.sender] == true, "only gateways are allowed mint");
_;
}
function addGateway(address _gateway) onlyValidator public {
gateway[_gateway] = true;
}
function removeGateway(address _gateway) onlyValidator public {
gateway[_gateway] = false;
}
}
```
The most important thing to note is the `mintToGateway` function. This allows the Transfer Gateway to mint tokens that are transferred from Binance.
> Note: You can find these contracts in the `./truffle/contracts` directory.
Now that we know how our ERC20 smart contracts look like, it is time to generate a zeknd private key:
```
npm run gen:zeknd-key
```
The above command will create a new private key and save it to the `./truffle/`zeknd`_private_key` file.
At this point, you're ready to deploy the smart contract to zeknd TestNet. This is as simple as:
```
npm run migrate:dappchain-bep2-token
```
### #1.f Mapping Contracts
Once you've deployed the `SampleBEP2Token` contract you'll need to send a request to the Transfer Gateway to create a mapping between the BEP2 and ERC20 tokens. This way, when the Transfer Gateway is notified that a token from Binance has been deposited to the hot wallet address, it will mint a matching token in your zeknd ERC20 contract (unless the token already exists on the zeknd TestNet). The Transfer Gateway will refuse to create a contract mapping unless you provide proof that you deployed both contracts. To prove that you deployed both contracts, you are required to:
* convert your Binance token symbol to an address that zeknd`-js` is able to work with:
```
const binanceTokenAddress = ethers.utils.hexZeroPad('0x' + Buffer.from(binanceTokenSymbol, 'utf8').toString('hex'), 20)
```
* build a message by concating the addresses of your Binance and zeknd tokens:
```
const msg = binanceTokenAddress + tokenExtdevAddress.slice(2)
```
* sign the message using your Binance private key:
```
const foreignContractCreatorSig = await signer.signAsync(msg)
```
* Lastly, call the `addContractMappingAsync` on the Binance Gateway with a bunch of parameters:
```
await gatewayContract.addContractMappingAsync({
localContract,
foreignContract,
foreignContractCreatorSig,
foreignContractCreatorTxHash })
```
Note that, on success,`addContractMappingAsync` doesn't return anything. However, if the mapping already exists, it'll throw- `Failed to commit Tx: TG012: contract mapping already exists`.
We've gone ahead and baked all the logic in the `./scripts/map-binance-contracts.js` script. Once you finish this tutorial, feel free to take a look and get a glimpse of how it works.
But before running the said script, we need to do some prep work:
* Save the symbol of our BEP2 token into a file called `./binance/binance-token-symbol.txt`:
```
echo -n "YOUR-TOKEN-SYMBOL" ./binance/binance-token-symbol.txt
```
* Next, we need to extract the Binance private key from the keystore file. Copy your `keystore_a` file into the `./binance` folder and rename it to `binance_keystore`.
* To map the contracts, type:
```
npm run get:binance-private-key
```
Now that you've put everything in place, let's go ahead create the mapping:
```
npm run map:binance-contracts
```
Great! Pat yourself on the back. You're now ready to spin up the demo project:
```
npm run start
```
Wait a bit until the demo gets compiled and then point your web browser at . Click on the `Deposit and Withdraw BEP2` tokens and you'll see a page that looks similar to the screenshot below:
Of course, your initial BEP2 and BNB balances will be 0. Go to Binance, and transfer some BEP2 and BNP to zeknd TestNet. To do so, set the `To Address` to `tbnb1gc7azhlup5a34t8us84x6d0fluw57deuf47q9w` (that is the hot wallet address) and don't forget to put your zeknd address in the memo field.
So far, we learned how to set things up and spin up the demo. Next, we'll look into how it works under the hood.
### #2 Under the Hood of the BEP-2 Demo
In this section, we'll explain the basics of building a bare bones web user interface that lets users move tokens between Binance and zeknd. You'll find everything into to the following files:
* `src/bep2-deposit-withdraw.js`
* `src/bep2/BEP2Coin.js`
* `src/bnb/BNBCoin.js`
In the next chapters, we'll take a closer look at the most important lines of code from these files.
#### #2.a bep2-deposit-withdraw\.js
This file deals with user interaction.
Things to note:
* Withdrawing BEP2 tokens to Binance requires a fee to be paid. Hence, the `depositWithdrawBEP2Example` function instantiates and then initializes both the `BNBCoin` and `BEP2Coin` classes:
```
this.bep2Coin = new BEP2Coin()
this.bep2Coin.load()
this.bnbCoin = new BNBCoin()
this.bnbCoin.load()
```
* Next, the `withdrawBEP2` first calls `this.bnbCoin.approveFee` to approve the fee and only after the fee gets approved, it goes ahead and calls `this.bep2Coin.withdrawBEP2`:
```
async withdrawBEP2 () {
if ((this.binanceAddress === null) || (this.binanceAddress.length === 0)) {
console.log('Binance Address should not be empty.')
return
}
const amountToWithdraw = 5
console.log('Withdrawing ' + amountToWithdraw + ' tokens to ' + this.binanceAddress)
await this.bnbCoin.approveFee()
console.log('Approved the transfer gateway to take the fee.')
await this.bep2Coin.withdrawBEP2(this.binanceAddress, amountToWithdraw)
console.log('Tokens withdrawn.')
}
```
### #2.b BNBCoin.js
If you followed along with our BNB tutorial, this should look very familiar to you. The most important change we've made is that we've added the `approveFee` function:
```
async approveFee () {
const fee = 37500
EventBus.$emit('updateStatus', { currentStatus: 'bnbApproving' })
const binanceTransferGatewayAddress = await this._getBinanceTransferGatewayAddress()
await this.zekndBNBContract.methods.approve(binanceTransferGatewayAddress, fee).send({ from: this.zekndUserAddress })
const delay = ms => new Promise(resolve => setTimeout(resolve, ms))
let approvedBalance = 0
while (approvedBalance == 0) {
approvedBalance = await this.zekndBNBContract.methods.allowance(this.zekndUserAddress, binanceTransferGatewayAddress).call({ from: this.zekndUserAddress })
await delay(5000)
}
EventBus.$emit('updateStatus', { currentStatus: 'bnbApproved' })
}
```
Also, we've replaced the hard coded Transfer Gateway address with a nice function that resolves the address by name:
```
async _getBinanceTransferGatewayAddress () {
const contractAddr = await this.client.getContractAddressAsync('binance-gateway')
return contractAddr.local.toString()
}
```
### #2.c BEP2Coin.js
The `BEP2Coin` class is similar in many respects to `BNBCoin` class, but there are a few differences. Let's take a closer look at how it works.
* First, we initialize a couple of things:
```
async load () {
this.currentNetwork = 'extdev'
this.networkConfig = networkConfigs.networks[this.currentNetwork]
this._createClient()
this._getzekndUserAddress()
this._getWeb3Instance()
this._getzekndBEP2Contract()
await this._getzekndBEP2TransferGatewayContract()
await this._filterEvents()
await this._refreshBalance()
EventBus.$emit('updateStatus', { currentStatus: 'waiting' })
}
```
This sets the current network to `extdev`, instantiates a new `Client`, gets the zeknd address, initializes a web3 instance and our contracts. Then, it calls `_filterEvents` so the balances get automatically updated. Lastly, it reads the initial balance and updates the status to `waiting`.
* To withdraw BEP2 tokens we must first approve the transfer gateway to take them, then we wait a bit and check if the `allowance` gets updated. If so, we go ahead and call `withdrawTokenAsync` (that is the function that actually withdraw the tokens):
```
async withdrawBEP2 (binanceAddress, amountToWithdraw) {
const amountInt = amountToWithdraw * 100000000
EventBus.$emit('updateStatus', { currentStatus: 'bep2Approving' })
const binanceTransferGatewayAddress = await this._getBinanceTransferGatewayAddress()
await this.zekndBEP2Contract.methods.approve(binanceTransferGatewayAddress, amountInt).send({ from: this.zekndUserAddress })
const delay = ms => new Promise(resolve => setTimeout(resolve, ms))
let approvedBalance = 0
EventBus.$emit('updateStatus', { currentStatus: 'bep2Approved' })
while (approvedBalance == 0) {
approvedBalance = await this.zekndBEP2Contract.methods.allowance(this.zekndUserAddress, binanceTransferGatewayAddress).call({ from: this.zekndUserAddress })
await delay(5000)
}
EventBus.$emit('updateStatus', { currentStatus: 'bep2AllowanceChecked' })
const bep2TokenAddress = Address.fromString('extdev-plasma-us1:' + this.zekndBEP2Contract._address.toLowerCase())
const tmp = this._decodeAddress(binanceAddress)
const recipient = new Address('binance', new LocalAddress(tmp))
await this.zekndBEP2Gateway.withdrawTokenAsync(new BN(amountInt, 10), bep2TokenAddress, recipient)
EventBus.$emit('updateStatus', { currentStatus: 'bep2Withdrawn' })
await delay(1000)
EventBus.$emit('updateStatus', { currentStatus: 'waiting' })
}
```
And that's about everything you need to know when it comes to moving tokens between Binance and zeknd!
Please feel free to reach out to us on Telegram if you have any questions about this tutorial or just want to leave us feedback.